View basket (0 items $0.00)

5 Ways to Practice Downward Facing Dog for Beginners
Downward Facing Dog Pose (Adho Mukha Svanasana) is one of the most fundamental and ubiquitous poses in the yogic repertoire. But it’s also an incredibly challenging posture to practice and sustain. Many beginners struggle to manage in this weight-bearing position without the adequate conditioning to support it. Luckily, though, there are many modifications of Downward Facing Dog for beginners.
While every pose can be modified and adjusted to suit the needs of the practitioner, Downward Facing Dog is one pose that is practiced so often that it’s definitely worth learning a few key modifications. So let’s explore five variations of Downward Facing Dog for beginners. Whether it’s your first time practicing or if you’re a teacher with newbies in your class, you or your students have a place to work that is both welcoming and challenging.
How Modify Yoga’s Downward Facing Dog for Beginners
For these variations, you will need a wall, two blocks, a blanket, and a yoga bolster.
In all of these variations of Downward Facing Dog for beginners, you can bend your knees to reduce the stretch on your hamstrings. You can also lower onto your forearms to reduce the load in your wrists.
1. Puppy Pose
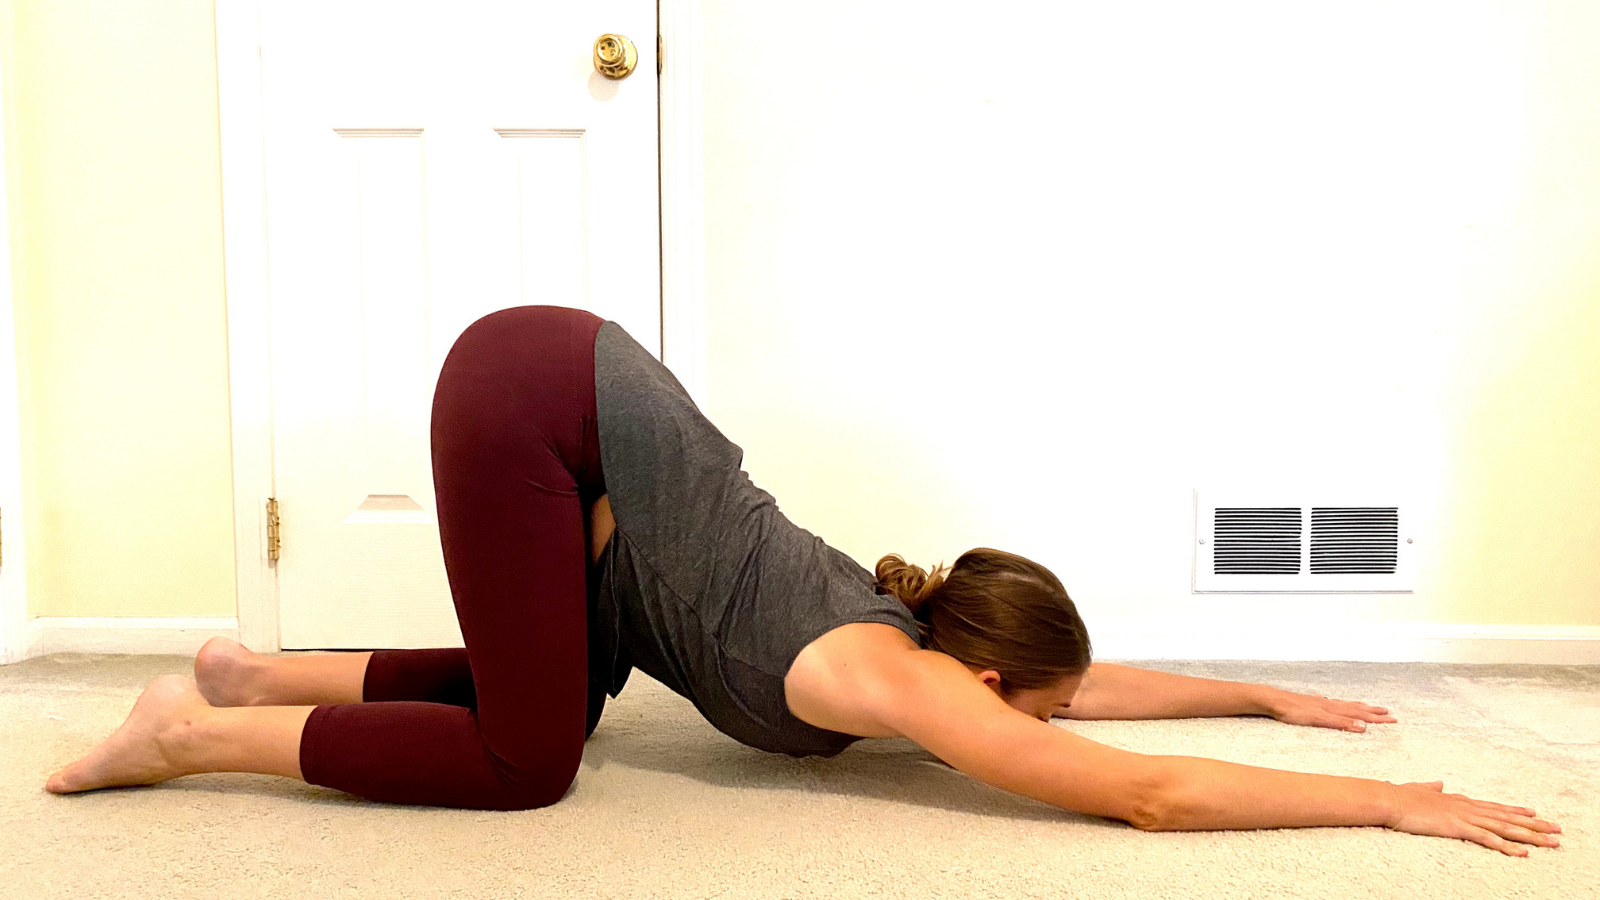
Downward Facing Dog Pose is sometimes just too much altogether for beginning practitioners. It’s a high-load position that we’re not conditioned for from functional everyday life.
So if the load is too much for your upper body, then you can modify the pose by simply lowering your knees to the floor and maintaining the rest of the shape in your upper body.
-
Start on all fours in Tabletop Pose (Bharmanasana) with your shoulders stacked over your wrists and your hips stacked over your knees. If you’d like, you can add padding under your knees by kneeling on a folded blanket.
-
Keep your hips aligned over your knees and slowly start to walk your hands forward toward the top of your mat as you firmly press into your palms to activate your arms.
-
Elongate from your sitting bones all the way down to the crown of your head to find length in your whole back body.
-
Press into the floor with your hands and activate your core to maintain length in your spine. Release your forehead to a prop or the floor.
-
Hold for a few deep breaths before slowly releasing out.
2. Wall Downward Facing Dog Pose
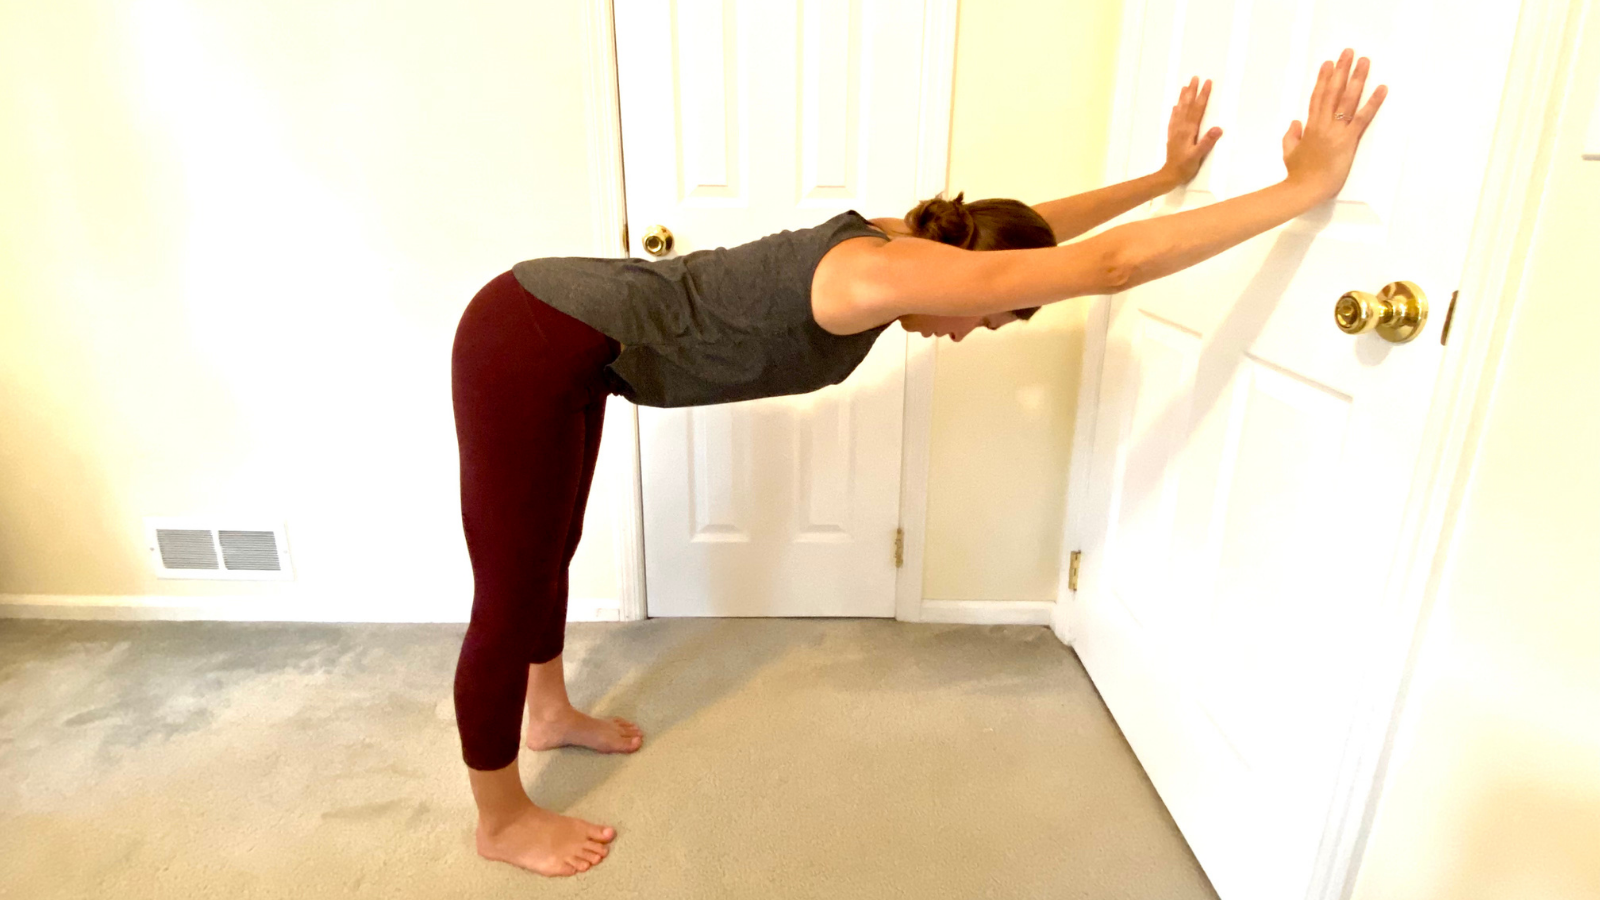
To effectively offer Downward Facing Dog for beginners, we need to lessen the load in the upper body and reduce the flexibility needed in the hips and hamstrings.
Using a wall to do this can be really helpful and effective.
-
Stand facing a wall and place your hands on the wall at roughly shoulder height and roughly shoulder-width apart. Spread your fingers and press into the perimeter of your palms.
-
Slowly walk your feet away from the wall as you simultaneously bend forward at the hip joints, melting your chest toward the floor. Lower your hands so that they are always roughly in line with your shoulders.
-
Continue to step your feet back until you find an appropriate distance in which you can lengthen your spine by reaching back through your sitting bones. Straighten your arms and press your hands into the wall in front of you.
-
Hold for a few deep breaths before slowly releasing out.
3. Block Downward Facing Dog Pose

This variation of Downward Facing Dog for beginners helps to reduce some of the load on the wrists and the upper body, which for most beginners, are not typically conditioned to bear much weight.
By adding blocks under the hands, you help to shift a lot of your weight back into your legs, which are typically better prepared to sustain body weight.
-
Place two blocks on their lowest or medium height setting at the top of your mat, roughly shoulders-distance apart.
-
Come into Tabletop Pose with your hands on the blocks.
-
Slide your knees back slightly to widen your Tabletop shape, and then tuck your toes under and lift your knees off the floor.
-
Stretch your hips up and back and send your sitting bones toward the sky.
-
Root down into your blocks and send a wave of energy up your whole spine to lengthen back out through your sitting bones.
-
Option to bend your knees as you soften the weight of your heels toward the floor (they don’t need to touch, though!).
-
Hold for a few deep breaths before slowly releasing out.
4. Bolster Variation
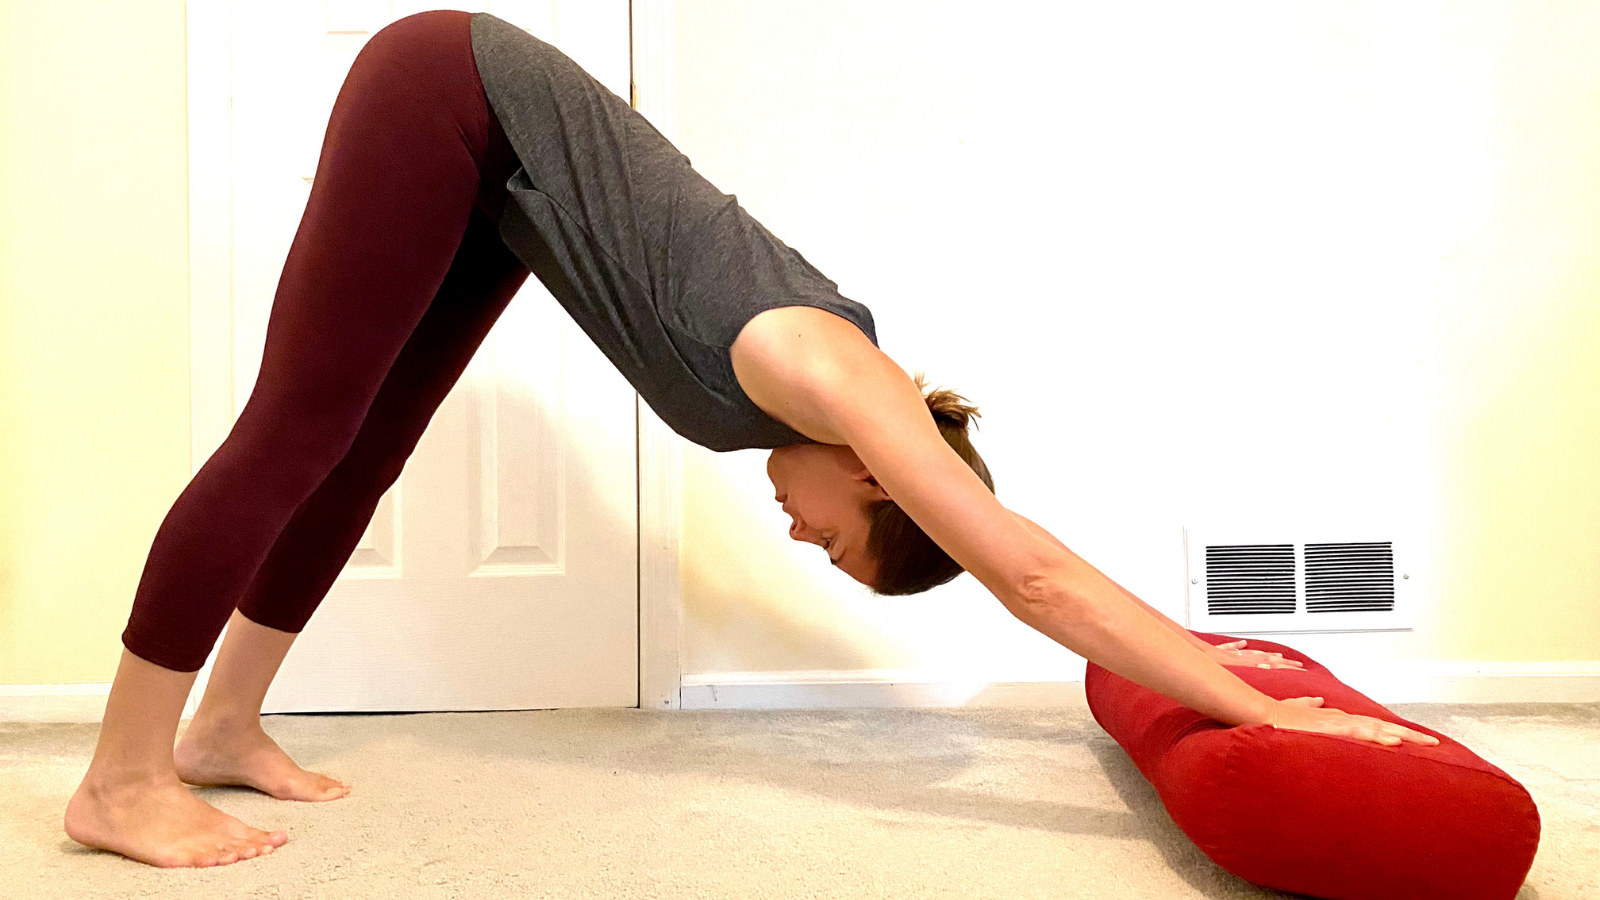
Most beginners complain about wrist pain when they first start practicing weight-bearing poses like Downward Facing Dog Pose. And even many seasoned practitioners deal with the same issues.
In our normal, everyday lives, we don’t typically load our wrists as extensively as we do on our mats in yoga practice. But we can teach our wrists to bear load more effectively by specifically activating various muscles in our forearms that support the wrists.
Using a bolster helps to offer visual and tactile feedback to employ the targeted muscles.
-
Place a bolster lengthwise at the top of your mat so that its long edge is parallel with the short edge of your mat.
-
Come to Tabletop Pose and place your palms on the bolster roughly shoulder-width apart.
-
On the soft surface of the bolster, notice where the weight in your wrists leans. Do you collapse into the heels of your hands? Do you press forward onto your fingertips? Equalize your weight across your hands so that your palms stay parallel to the floor and the bolster doesn’t sink in at any one spot.
-
Maintain this activation in your arms as you slide your knees back slightly behind your hips and tuck your toes under.
-
Lift your knees off the floor and stretch your hips to the sky. Lengthen your back body and relax your head and neck.
-
Check back in with your wrists and firmly root down into your bolster while equalizing your weight across your palms.
-
Hold for a few deep breaths before slowly releasing out.
5. Blanket Under the Heels
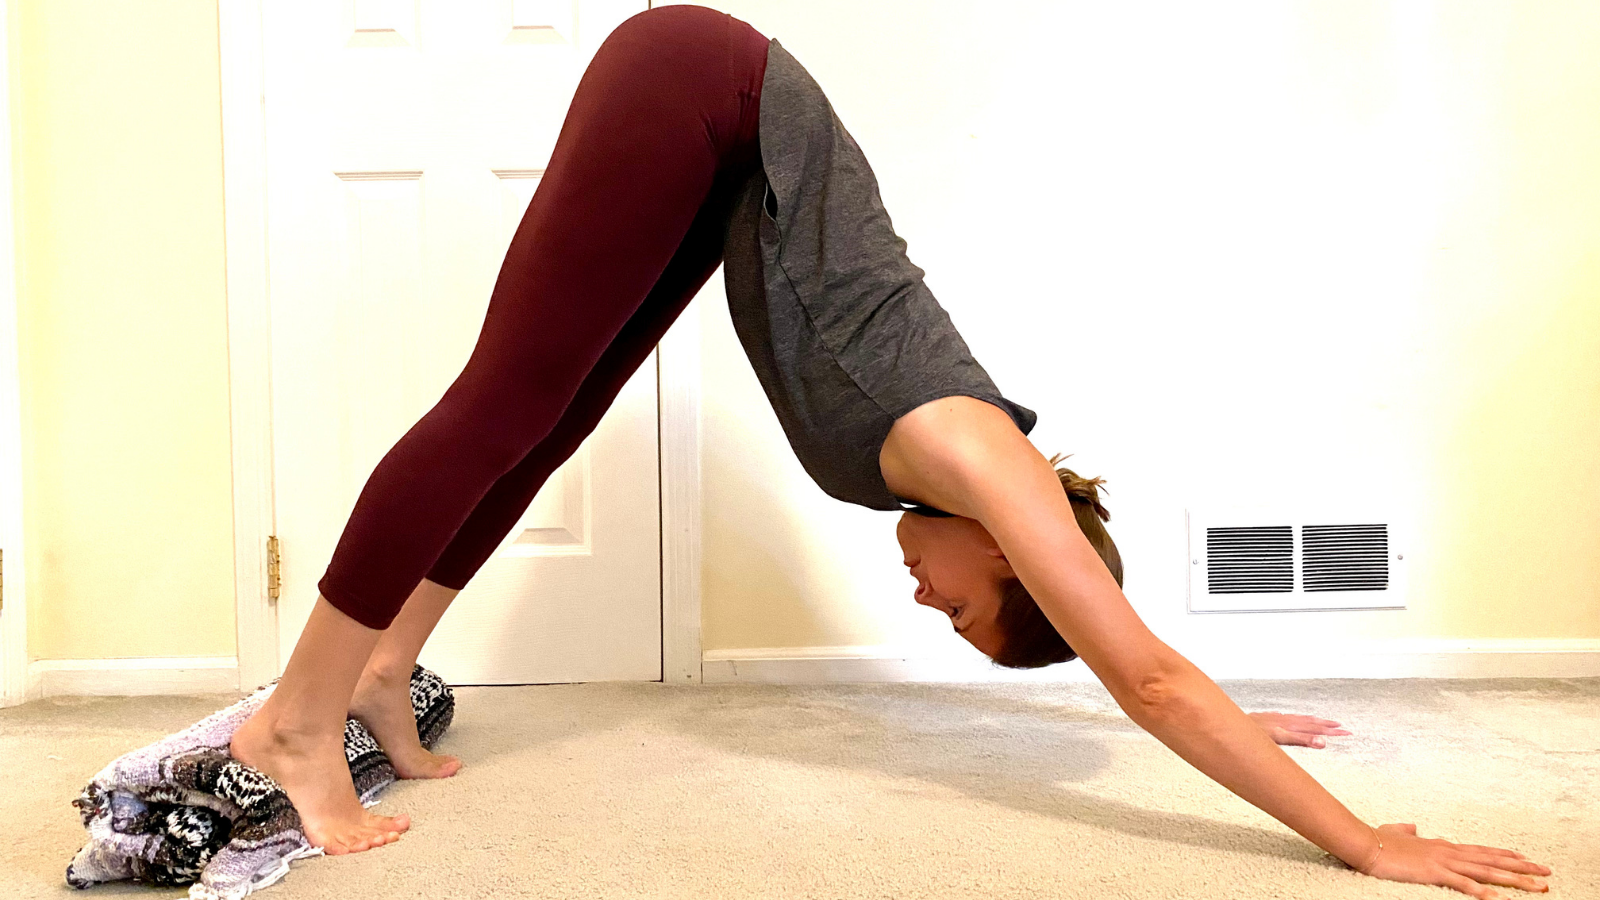
Downward Facing Dog for beginners is often challenging due to a lack of dorsiflexion available at the ankle joint. Many beginners have tighter calves and Achilles tendons that reduce mobility at the ankle.
So to sustain Downward Facing Dog for any period of time can be challenging with the heels floating in the air.
A blanket is a great fix to help bring the floor closer to your heels.
-
Roll up a thick blanket and place it at the back of your mat.
-
Come to Tabletop Pose and tuck your toes under to place the soles of your feet directly onto the blanket behind you.
-
Walk your palms forward about the distance of one of your own hands to slightly widen your stance.
-
Activate your core and lift your knees off the floor as you stretch your hips toward the sky. Elongate from the crown of your head up through to your sitting bones.
-
Relax the weight of your heels down toward the blanket beneath you.
-
Hold for a few deep breaths before slowly releasing out.
Using Props to Modify Downward Facing Dog for Beginners
In reality, Downward Facing Dog is not necessarily a pose for beginners. It’s challenging and requires a lot of strength and flexibility.
But it can be modified to suit a practitioner of any skill level—including beginners.
So grab some props and play around with these suggestions as well as others to find the best ways to practice Downward Facing Dog for beginners.
 Leah Sugerman is a yoga teacher, writer, and passionate world traveler. An eternally grateful student, she has trained in countless schools and traditions of the practice. She teaches a fusion of the styles she has studied with a strong emphasis on breath, alignment, and anatomical integrity. Leah teaches workshops, retreats, and trainings, both internationally and online. For more information, visit www.leahsugerman.com.
Featured Courses
